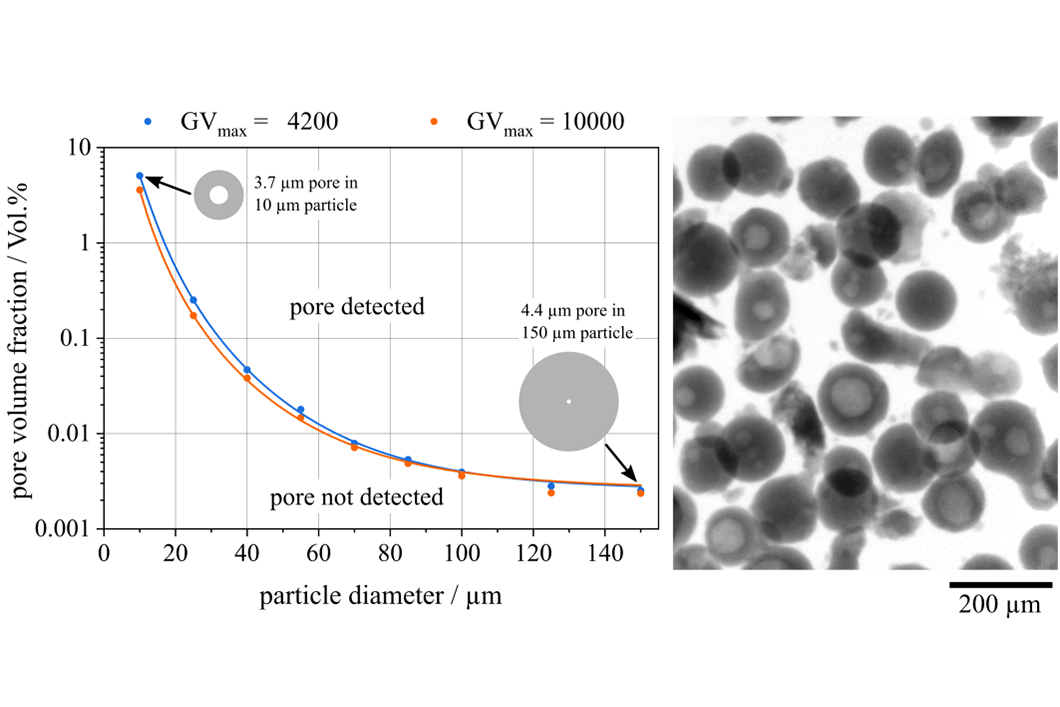
Plot of the detectability of pores in metal powder for the used X-ray setup (left). Radiograph of a metal powder with large pores (right).
Source: BAM, Radiological Methods division
The quality of additively manufactured (AM) parts is determined by the process parameters used in the application and the properties of the feedstock powder. The influence of inner gas pores in feedstock particles on the final AM product is a phenomenon which is difficult to investigate since very few non-destructive measurement techniques are accurate enough to resolve the micropores. 3D X-ray computed tomography (XCT) is increasingly applied during the process chain of AM parts as a non-destructive monitoring and quality control tool and it is able to detect most of the pores. However, XCT is time-consuming and limited to small amounts of feedstock powder, typically a few milligrams. The aim of the presented approach is to investigate AM feedstock particles using digital radiography as a simple and fast quality check with high throughput. 2D digital radiographs were simulated in order to predict the visibility of pores inside metallic particles for different pore and particle diameters. An experimental validation was performed. It was demonstrated numerically and experimentally that typical gas pores above a certain size (here: 3 to 4.4 µm for the selected X-ray setup), which could be found in metallic microparticles, were reliably detected by digital radiography.
Radiographic Visibility Limit of Pores in Metal Powder for Additive Manufacturing
Gerd-Rüdiger Jaenisch, Uwe Ewert, Anja Waske, Alexander Funk
published in Metals - special issue - Advanced Characterization and On-Line Process Monitoring of Additively Manufactured Materials and Components, Vol. 10, issue 12, page 2634
BAM, division Radiological Methods


